Building a jQuery Mobile HTML5 App with PhoneGap for Drupal 7, Part 2
In this post, we’re going to add functionality to take a picture to our jQuery Mobile app using the PhoneGap Media Capture API. We’ll add a button with jQuery Mobile that brings up the mobile phone’s camera.
With jQuery Mobile, to make buttons, we can use the <a href> tag with a data-role=“button” attribute. If you’re submitting a form, use the <button> tag instead - jQuery Mobile will format both of those the same way. We’ll go ahead and add a button that doesn’t do anything yet - replace the contents of the <div data-role="content"> tag with this:
<div data-role="content">
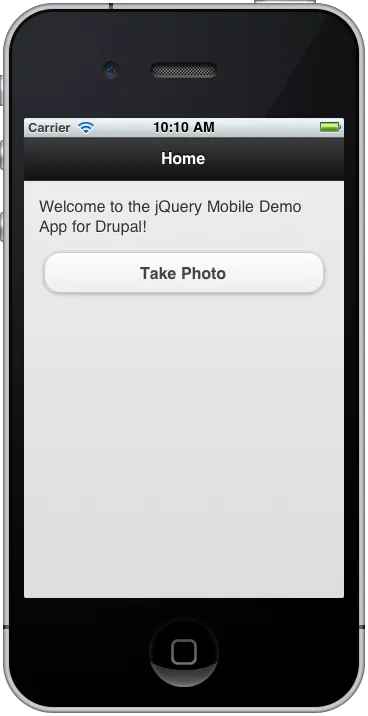
Welcome to the jQuery Mobile Demo App for Drupal!
<p/>
<a id="takePhotoButton" data-role="button">Take Photo</a>
</div>Run it in the iPhone Simulator, and it looks pretty good for us not having to do too much!
We’ll take advantage of jQuery’s bind method and PhoneGap’s deviceready event for our button functionality.
One gotcha you will probably run into is that you’re used to binding to the click event with jQuery on desktop browsers. With jQuery Mobile, we need to bind to the tap event for our button instead.
We’re using the PhoneGap Media Capture API with the camera - only one line of Javascript needed to bring up the camera on the phone.
navigator.device.capture.captureImage(captureSuccess, captureError, {limit: 1});You’ll need to provide functions to handle success and errors, along with PhoneGap’s CaptureImageOptions. In our case, we’re limiting the number of photos the user can take to one at a time.
Here’s the JavaScript we need to add to our index.html
<script>
        function captureSuccess(mediaFiles) {
            navigator.notification.alert('Success taking picture:');
        }
        function captureError(mediaFiles) {
            navigator.notification.alert('Error taking picture: ' + error.code);
        }
        $(document).bind("deviceready",function () {
            $("#takePhotoButton").bind("tap", function() {
                navigator.device.capture.captureImage(captureSuccess, captureError, {limit: 1});
            });
        });
</script>
You won’t be able to see this run in the iPhone Simulator, because the iPhone Simulator doesn’t have a camera - instead, you’ll need to run it on an actual iPhone (or iPod Touch or iPad with a camera).
In my next post, we’ll cover how to upload images to Drupal 7 using Services 3.